Showing posts with label mac book. Show all posts

Saturday, May 05, 2007

Installing Solaris 10 on Mac Book using Parallels (5): Installing RTL8029

Solaris 10 currently does not support the RTL8029 network driver to be emulated in virtual machines. In order for us to have RTL8029 support on a Solaris 10 virtual machine, we must install the RTL8029 network adapter driver. This driver can be configured manually or by running the network.sh script. When Solaris 10 virtual machine is running, we need to connect vmtools.iso to the CD/DVD ROM drive of Solaris 10 machine. To do this, go to Devices / CD/DVD ROM / Connect Image.

Now browse to Library / Parallels / Tools / vmtools.iso and click open. Then browse to /cdrom/prltools/drivers/network/solaris and run network.sh.

At this point, you should be able to ping your favorite website and confirm that you have been assigned an IP address.


NEXT:
Installing Solaris 10 on Mac Book: part 1
Installing Solaris 10 on Mac Book using Parallels: part 2
Installing Solaris 10 on Mac Book using Parallels: part 3
Installing Solaris 10 on Mac Book using Parallels: part 4
Installing Solaris 10 on Mac Book using Parallels: part 5

Installing Solaris 10 on Mac Book using Parallels (4)

Ok, so after the installation ended I got the dreaded "Solaris 10" Software Installation partially failed.


The detailed error messages were located in /tmp/install. Most errors were related to unallocated space in UFS something that may be explainable by the fact that it is an expanding file system and for a virtual machine. However most installations were successful so I decided to ignore the errors for now (after logging) and proceed.


Next was the confirmation screen for additional software which had installed successfully.


At this point you should be seeing a reboot screen like the one displayed below


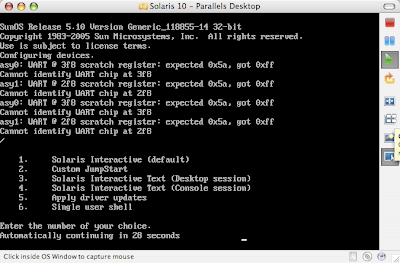
Upon reboot, there were some errors related to scratch registers. I will investigate them later but for now, let's continue. These errors relate to the fact that we are running as a virtual machine.


At this point the virtual machine froze for a long time so I decided to stop and start the execution again. This time I got the "All devices are configured" message followed by a question about whether I would like to overwrite the system's default NFS version 4 domain name. I answered no.

Then Solaris started in GUI mode. At this point I can finally login.

When you login for the very first time, you will be presented with the option of choosing the default desktop.
.
At this point, I will like to get the networking working (:)) as that has been an issue so far. I will continue from this point on in my next post.

NEXT:
Installing Solaris 10 on Mac Book: part 1
Installing Solaris 10 on Mac Book using Parallels: part 2
Installing Solaris 10 on Mac Book using Parallels: part 3
Installing Solaris 10 on Mac Book using Parallels: part 4
Installing Solaris 10 on Mac Book using Parallels: part 5

Installing Solaris 10 on Mac Book using Parallels (3)

This is the third part of installing Solaris 10 on Mac book as a virtual machine using Parallels.

We left off at the "Type of Install" screen for which I am going to choose Custom Install.

Next, choose the software localizations. If you don't choose any localization, the default English version of Solaris will be installed.

The default selection was English POSIX C (C). I chose the English US UTF-8 as the inital locale to be used after the system initializes.

Depending on your preference, you may also want to install Java Enterprise System for development etc.

If you would like to scan for additional Solaris products and you have them on a local or network file system, you can do so in the next step.

I will be installing the Entire Group. which will include the developer solaris software and additional software needed for servers.

Next is the disk selection screen. The default configuration here is just fine.

In the next screen you can select disk(s) for fdisk partitioning. Each disk selected for file system layout must have a Solaris fdisk partition. Each system can only have one X86Boot partition.

For the next screen, the default options are fine.

Now Solaris will determine size requirements based on your selections and then present information about Lay Out File Systems

If everything looks good click next to confirm and install your selections.

Now sit back and enjoy the installation as it proceeds.

To be continued...
NEXT:
Installing Solaris 10 on Mac Book: part 1
Installing Solaris 10 on Mac Book using Parallels: part 2
Installing Solaris 10 on Mac Book using Parallels: part 3
Installing Solaris 10 on Mac Book using Parallels: part 4
Installing Solaris 10 on Mac Book using Parallels: part 5

Installing Solaris 10 on Mac Book using Parallels (2)

In my last post, I started a guide to install SOlaris 10 as a virtual machine on Mac book using Parallels. This is a continuation of that post.

After clicking finish, I was presented with the following screen for a moment:
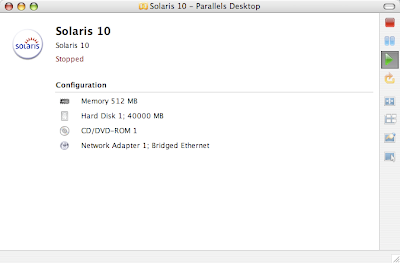

Then it started to make an attempt to boot, however since the DVD wasn't ready, the boot failed.
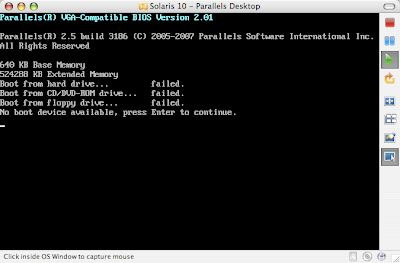

Before I know it, I was seeing the message presented in the following screen shot:
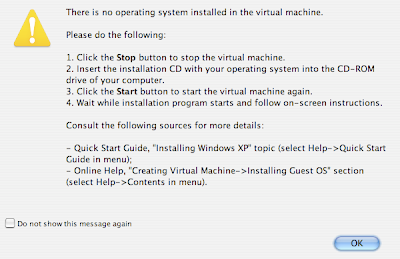


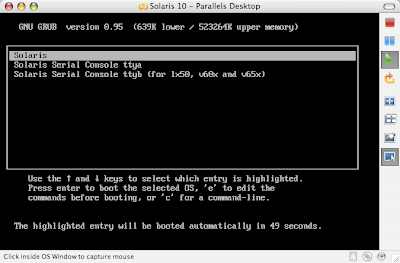
Don't worry if you see a similar message. All you gotta do is stop the virtual machine, make sure the Solaris 10 DVD is inserted and then click on the start button to start the virtual machine installation once again.

Soon you will be presented with the following options. Just make sure you select Solaris and hit Enter. If you still get errors about not being able to mount DVD ROM, just try again :)


Next, choose the type of installation. I chose Solaris Interactive.

At this point, you will see messages regarding
"Using install cd in /dev/dsk/c0t1d0p0
Using RPC Bootparams for network configuration information
Beginning System identification
Searching for configuration file(s)...
Search complete"

If you experience that you are stuck at "Searching for configuration file(s)" for a very long time, try stopping and restarting virtual machine installation.

Next you will be presented with "Proposed Window System Configuration for Installation"
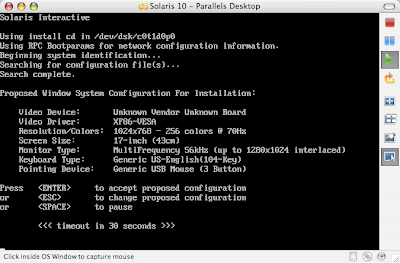

I wanted to decrease the resolution as with the default resolution in my earlier installation attempts, I wasn't able to run Solaris 10 in full screen mode. If you press ESC, you can change the defaults using kdmconfig.
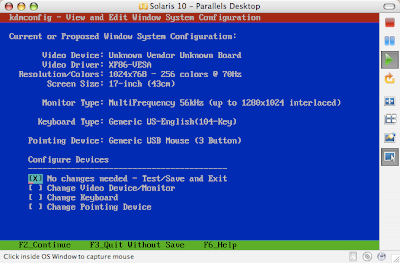


Keep going through the screens by pressing [fn + F2] until you get to the kdmconfig screen that asks you to specify screen size selection. I chose 13-inch since I have a 13-inch Mac book. The default selected for me was 17-inch.

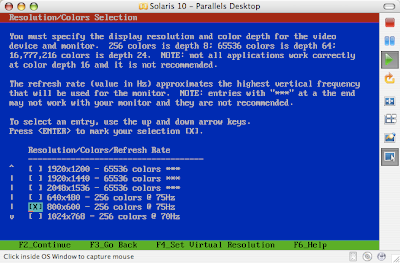
Clicking next will bring you to "Resolution/Colors Selection." Based on the issues I had with earlier installs, this is what I was looking for. The default selection was 1024x768-256 colors @70 Hz.
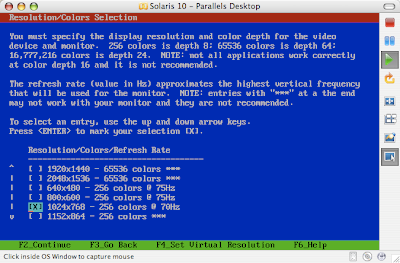

I chose 800x600 - 256 colors at 75Hz.
My final configuration looked something like:
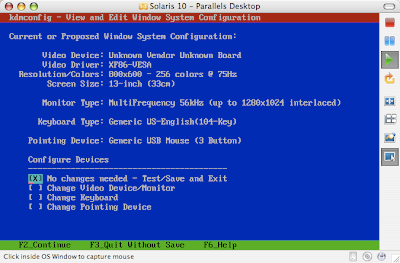
Next, we are ready to now run the kdmconfig Window System Configuration test.
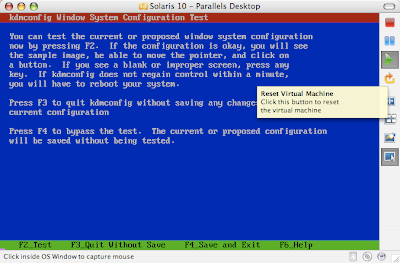
Run the test by pressing F2 (fn+F2) and you should see something like the following:
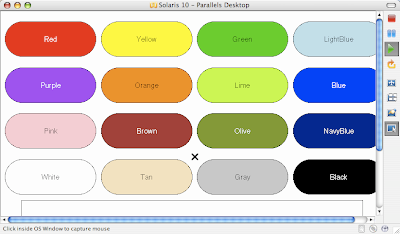
Seeing the test results, I went back and changed from 256 colors to 65536 colors. After running the test successfully for the new resolution, I was presented with the language choice screen.
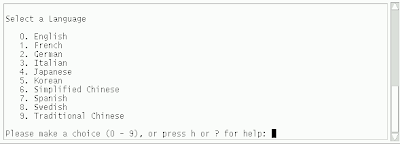
Once you select the language, you will see the following screen for some time.
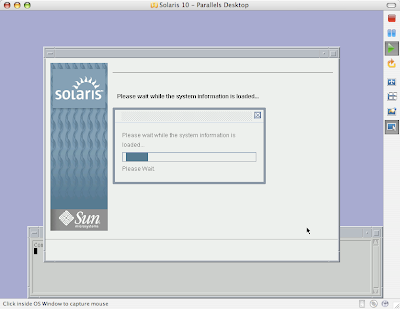
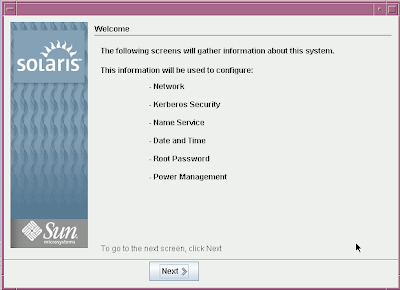
Now we are ready to give Solaris 10 virtual machine information regarding the system.
Go ahead and specify the hostname for your virtual machine.
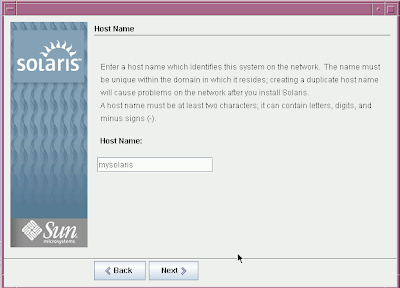
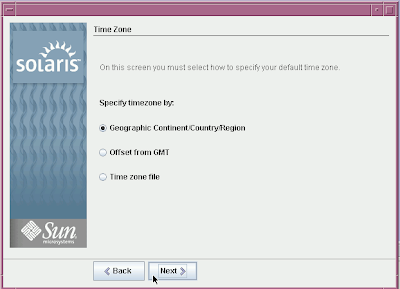
After specifying the hostname, we need to specify the time zone.
Specify the root password on the next screen:
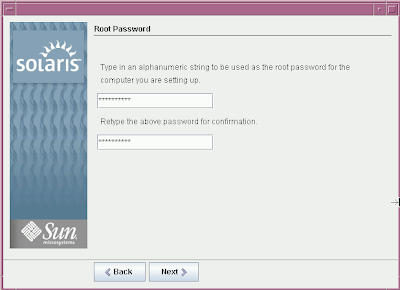
At this point it is important to note that Solaris 10 only cares about the first 8 characters of your password. After those 8 characters you can specify whatever gibrish you want and it will authenticate successfully. I know it's very bizarre and questionable behavior of Soalris in a world where protecting sensitive information is extremely important.

Next, you will see the selection summary. Click on confirm to continue with Solaris Installation.

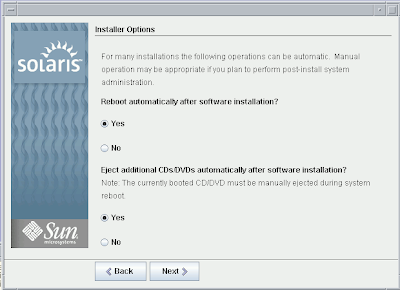
The default Installer options displayed in the next step are fine.

Specify the media from which you intend to install Solaris 10 Operating System. For our purpose, the default (CD/DVD) is fine.
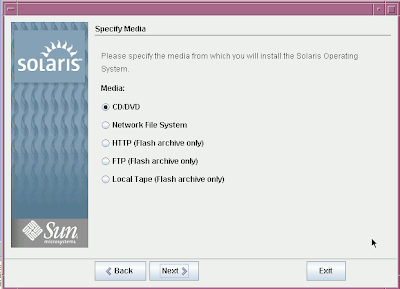

Now the system initialization begins. In a moment you will be asked to accept the agreement to continue installation.

Next choose Default install if you want to install basic Solaris products and tools in their default location. I am however, going to choose Custom install.

To be continued in my next blog post.
NEXT:
Installing Solaris 10 on Mac Book: part 1
Installing Solaris 10 on Mac Book using Parallels: part 2
Installing Solaris 10 on Mac Book using Parallels: part 3
Installing Solaris 10 on Mac Book using Parallels: part 4
Installing Solaris 10 on Mac Book using Parallels: part 5

Installing Solaris 10 on Mac Book using Parallels

Yesterday, I got myself a Mac Book with 2GB of RAM and I am very excited about it. Earlier I created a Microsoft Windows XP virtual machine using Parallels. The whole process was a breeze. While going through Parallels documentation that it partially supports Solaris 10 as well. I had a DVD with Solaris 10 6/06 handy (which folks at Sun gave me when I visited them around two months ago in New York) so I thought why not try it out as if it works, I would have my dream machine ready. My work is 100% Solaris 10 shop as far as my professional duties are concerned. However, I didn't want to buy a Solaris 10 laptop due to lack of support available.

One cool thing about Parallels is that it lets you choose between "Shared Networking" and "Bridged Networking". Shared Networking is ideal if you don't want your virtual machine to have its own IP. This way your virtual machine will not be visible on the network.

Overall, creating virtual machine for Solaris 10 was not hard at all. However, I did run into networking issues that I couldn't solve even through command line or through smc. It turns out that in order for Solaris 10 to have networking support, you need to have Parallels networking tools installed. Since my work on this Mac Book is going to mostly revolve around MySQL, I need networking setup for Solaris. Another troubling issue I encountered was trying to run Solaris 10 in full screen mode as Solaris cannot the support the 1280x800 resolution.

Step 1: Launch Parallels for Mac
If you want to create a new Solaris 10 Virtual Machine then click "New" after launching Parallels desktop to launch OS Installation Assistant. Once the assistant launches, choose "Custom" and click next.

If you are wanting to reset your existing Solaris 10 Virtual machine for whatever reason, you can select the virtual machine you would like to operate on and then under the File menu, click on delete to launch an assistant program.


In the next step, select the OS Type as Solaris and OS Version Solaris 10 and click next.


Next, you will be asked to specify the amount of RAM for your virtual machine. The default selection would be 256MB. It is highly recommended that you choose a value larger than 400MB because otherwise you will not be able to run the GUI for Solaris. Since I need to run Chime, a dtrace tool, I chose 512MB.

Once you have specified the amount of RAM to use for Solaris 10, click next to select virtual hard disk option. Since we are creating a new virtual machine, select "Create a new hard disk image."

After clicking next, we need to specify the size of the virtual hard disk. It is recommended that you leave the default 32GB and select Expanding format for the virtual hard disk. If you are installing Solaris 10 with typical options, this is the format that will be selected by default.

The benefit of selecting Expanding format is that the size of the virtual hard disk will be 0 when created. The size grows up to the max specified size. Since the space is allocated on demand, you get hard drive space saving.

Clicking next will ask you to select a networking option for the Solaris 10 virtual machine. The default "Shared Networking" will let our Virtual Solaris 10 machine use Mac's network connections. Based on my earlier experiences with Solaris 10, I encourage you to select "Bridged Ethernet" which will make our Solaris 10 virtual machine appear as a separate machine on the Internet.

On the next screen keep the "Default Adapter" selected for the real network interface to be used by Solaris 10 virtual machine.


Now we are ready to name our Solaris 10 virtual machine on the next screen.


Believe it or not, we are actually ready to start the installation. Since I am installing the virtual machine using a real DVD and not from an ISO image, I kept the default options selected. Make sure you have inserted the Solaris 10 DVD/CD at this point before continuing.


Clicking finish at this point will launch the Solaris 10 installation process. I will continue from this point in my next blog post.

NEXT:
Installing Solaris 10 on Mac Book: part 1
Installing Solaris 10 on Mac Book using Parallels: part 2
Installing Solaris 10 on Mac Book using Parallels: part 3
Installing Solaris 10 on Mac Book using Parallels: part 4
Installing Solaris 10 on Mac Book using Parallels: part 5